
HELP / GET STARTED
Audio Setup in the standalone app
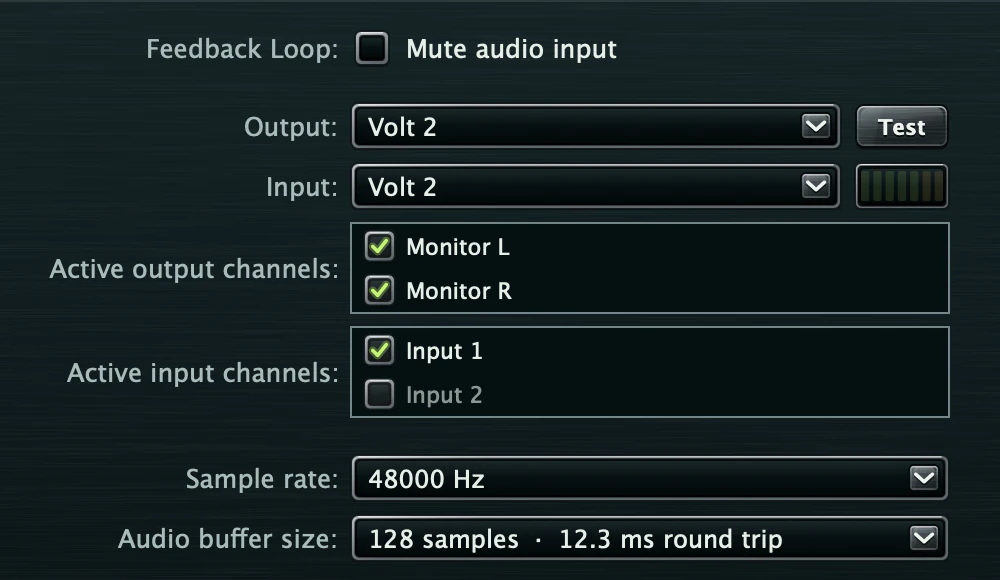
Choose your interface, the input your guitar is on, the sample rate and the buffer size.
The standalone apps talk to your audio interface directly. In a DAW, the DAW does this for you and Audio Setup isn’t shown.
- 01
Open Audio Setup
In the Complete Chain press AUDIO SETUP in the toolbar, or click the LATENCY readout in the status bar. In a single plugin’s app, click the strip along the bottom of the window, which shows your interface, rate, buffer and round trip, or use Options › Audio Setup….
- 02
Pick your interface
Choose it as both Output and Input. Plug your headphones or monitors into the same interface.
- 03
Pick your guitar input
Under Active input channels, tick the input your guitar is plugged into. The Complete Chain listens to one guitar input by default; tick a second one if you play in stereo.
- 04
Set the rate and buffer
Start at 48000 Hz. A new install, and the first launch of each new version, starts at 64 samples; after that the app keeps the size you choose, and presets never change it. Each size shows its round trip, for example “128 samples · 12.3 ms round trip”. If you hear clicks, go up one size.
Turn off direct monitoring
Most interfaces have a direct-monitor knob or switch that sends the dry guitar straight to your headphones. Turn it off, or you will hear the dry guitar under the processed one.
Mac
The first time you open a standalone app, macOS asks to let it use the microphone. That is your audio interface’s input: choose Allow. If you said no, open System Settings › Privacy & Security › Microphone and switch the app on.
Windows
On first launch the app picks Windows Audio (Low Latency Mode), and falls back to Windows Audio if your interface doesn’t support it. Your own choice is remembered after that. The standalone apps don’t offer ASIO yet; if you need your interface’s ASIO driver, load the VST3 in an ASIO-capable DAW.